Hey ukulele players! Are you willing to improve your technique skills with some basic warm up exercises for your fingers? Great! In this “Finger fitness” edition, we’re going to check out a few basics which can help you to improve the plucking technique. Enjoy!
Estimated reading time: 5 minutes
In this finger fitness for ukulele blog post you’ll find:
Recap of the previous edition
In our previous Finger Fitness edition for ukulele we talked about very basic things:
- finger names for the right and left hands;

- how to train the fingers of the right hand to pluck the corresponding string(s);
- how to train the fingers of the left hand to hover over the corresponding frets.
Now it’s time to talk about how we can develop our technique if we want to pluck two or more strings at the same time, to make them ring together with the same level of volume.
Right hand plucking technique practice
Let’s start with playing 2 strings at a time. This can be any combination of strings, depending on the musical context.
We’re training the “p”, “i”, “m”, and “a” fingers of the right hand to pluck the strings at the same time with the same volume level. It’s a good way to start practicing with the open strings, and it allows us to be fully concentrated on the right hand while playing.
From the previous edition, we remember that the p-finger plays the 4th (G) string. The i-finger plays the 3rd (C) string, the m-finger plays the 2nd (E) string and the a-finger plays the 1st (A) string.

We’ll pluck 2 strings, as mentioned below, by using these pairs of fingers on the right hand:

Try to pluck both strings at the same time – then you can hear that the strings really ring together with the same level of volume.
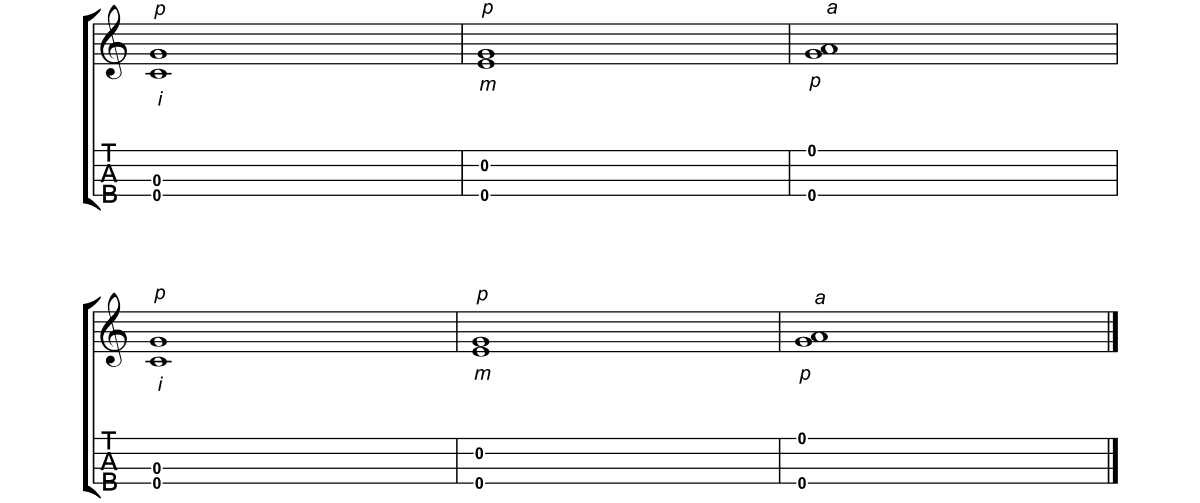
Check our video for this exercise. Below you can also find the note charts with tablature and fingers for the right hand for this exercise.
Here are the note charts with tablature for the exercise:
Combine left and right hands
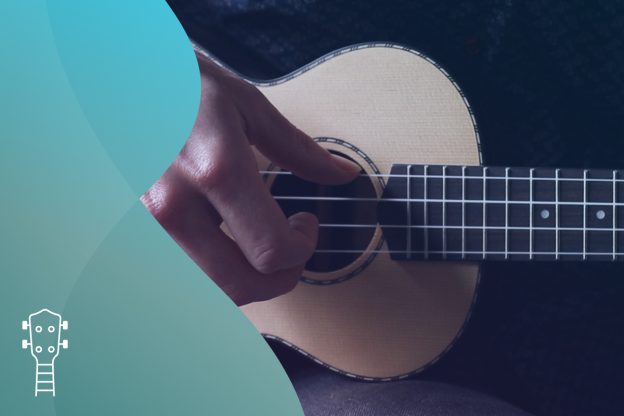
When you have practiced the plucking technique with the open strings, let’s try to combine both your hands and practice with the A chord – one of the basic chords for ukulele. Of course, you can choose any other chord you like. We chose the A chord, since it has two pressed strings as well as two open strings.

We’ll pluck the same combination of two strings as before. The only difference is that now the 4th (G) string will be pressed on the 2nd fret and the 3rd (C) string will be pressed on the 1st fret, as you can see in the diagram above.
Check our video for this exercise. Below you can also find the note charts with tablature and finger names for this exercise.

Do the same exercise with other ukulele chords you know! For each chord, we press different combinations of strings at different frets. And we can get a mix of open and pressed strings with the same chord. This is a good way to train our fingers to pluck the strings and to produce the sound.
Final thoughts
You’ve just learnt an exercise on how to train the plucking technique on your ukulele by playing two strings at the same time. Now it’s time to apply it by jamming along with your favorite songs! Or check out our Top 50 Premium channel, where you can get inspired and try out our Premium features for free. Read our previous Finger Fitness for ukulele edition for more exercises. Happy jamming!

