
What’s up, guitar player? Always wanted to improve your jams with a simple drill? You’ve come to the right place. “Finger fitness” is the series where we show you cool exercises for guitar, piano, and ukulele. In this blog post on finger fitness for guitar, we’ll cover some basics which can help you to improve your technical skills. Enjoy!
Estimated reading time: 6 minutes
In this blog post on finger fitness for guitar you’ll find
Right hand finger fitness
Let’s start with the Right hand – the hand which is plucking and/or strumming the strings. (For left handed players it would be the left hand). In the classical guitar technique we use four fingers of the right hand. Their names come from Spanish:

Figure 1 – Right hand with fingers names
In order to know where to place the fingers of the right hand, it’s important to know which string(s) each finger usually plays.
P-finger is responsible for the bass strings – thickest 6th (E) string, 5th (A) string and 4th (D) string. So, often you play these bass strings with the p-finger.
I-finger is often responsible for the 3rd (G) string.
M-finger is responsible for the 2nd (B) string.
A-finger is responsible for the 1st (E) string respectively.

Figure 2 – A picture of the strings and fingers.
How to train your right hand
It’s a good habit to place your right hand fingers next to the corresponding strings. Then you can be sure that you’re ready to play. Here is a good exercise on how to train your right hand. Place your fingers on the corresponding strings: p-finger on the 6th string (or 5th, or 4th string); i-finger under the 3rd string; m-finger under the 2nd string; a-finger under the 1st string. See Figure 2.
Now play the 6th, 5th and 4th strings by p-finger without moving i, m, a – fingers from the strings. Then do it the other way around: play only the 3rd string with your i-finger, then only the 2nd string with the m-finger, then only the 1st string with your a-finger without moving the p-finger from a bass string.
This exercise trains your right hand to play different strings with the corresponding fingers, while keeping the rest fingers next to the strings.
Left hand finger fitness
Let’s talk about the left hand – the hand which is pressing the strings on the fretboard. (For left handed players it would be the right hand). In the classical guitar technique we use four fingers of the left hand, which are numbered 1 to 4.
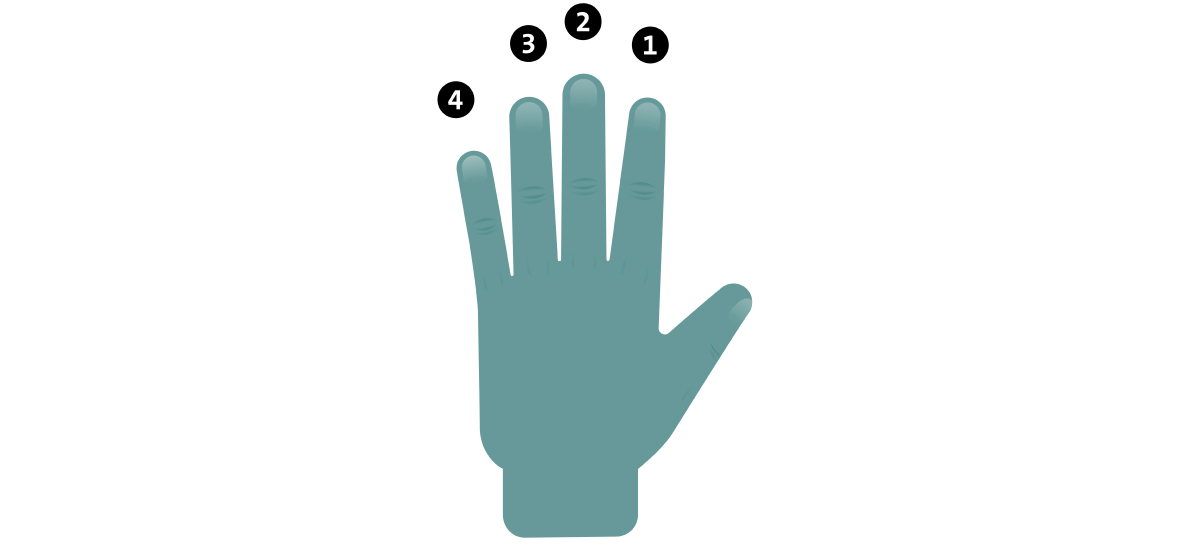
Figure 3 – Left hand with fingers names.
We assume that you know the basic technique of how to place the fingers of the left hand on the fretboard? And now we’re going to talk about a classical exercise on how to train the fingers of the left hand.

It’s a good habit to hold each finger over a certain fret on the fretboard. It’s very handy for playing some passages or lines on guitar. This is called position playing on guitar.
How to train your left hand
Here is the classical exercise for the left hand, associated with the location of the fingers on the frets. You can start this exercise from any fret you want. We’ll start with the first fret on the first (E) string. Just assign the right finger to the right fret, in this case it’s the first finger on the first fret, the second on the second fret and so on.
Press the first fret on the first string with your first finger. Yeah, that’s a lot of firsts right there. While you’re doing so, the other fingers are hovering relaxed over the assigned frets. Moving to the second fret, press the same string with the second finger. Again the other fingers rest, hovering over their frets.
Repeat this for all four fingers. After that go back in the opposite direction, finishing with the first finger on the first fret. It’s important to mention that we press the strings in the same way as we usually play them – close to the next fret.
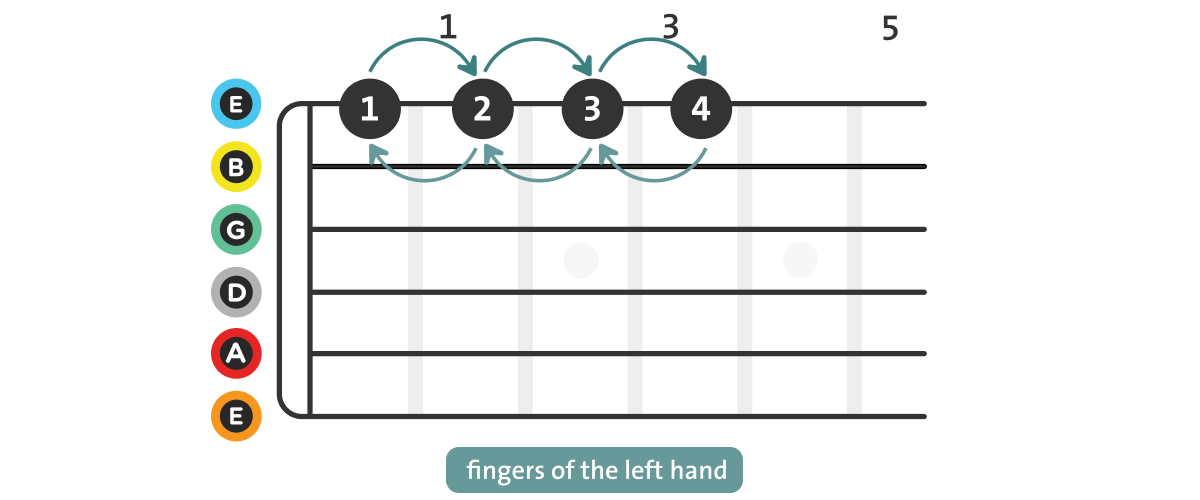
Figure 4 – Exercise for the left hand.
Variations
After that, you can move to the second (B) string and do the same movement from the first to the fourth fret. Then it’ll be the turn of the third, fourth, fifth and sixth strings. This exercise isn’t bound to the first four frets.
You can move your left hand to any place on the fretboard: from the second to the fifth fret, from the third to the sixth fret and so on. Each time we get an interval of four adjacent frets, since four fingers of our left hand are involved in playing.
Tips & Tricks
You can do this exercise with only your left hand – to be fully concentrated on the finger movements.

Later, you can involve your right hand by playing these pressed notes. For study purposes, play all notes on the 1st string with your a-finger (remember?), all notes on the 2nd string with your m-finger, all notes on the 3rd string with your i-finger. Play all notes on the 6th, 5th and 4th strings with the p-finger.

Final thoughts
In this blog post, we showed you one of many basic guitar exercises for your fingers. Try to incorporate it into your jamming routine by doing the exercise right before you start playing along with your favorite songs. If you need some motivation, check out this blog post on building up a routine. If you’re looking for inspiration just browse through the Jamuary channel. Happy jamming!

